Whenever I want to upload images with my articles, I make sure they are of the right size first and then I have to check the file sizes and if they are too big, I will have to compress them. For this compression, I use Tinypng. They compress your images to a small size all the while keeping the image looking the same. I've tried some other services as well, but TinyPNG is definitely the best as their compression ratio is quite impressive.
In this article I'll show you how I'm planning to automate the image compression process using TinyPNG's developer API. And of-course we are going to using python.
Setting up
First of all, you need to have a developer key to connect to TinyPNG and use their services. So, go to Developer's API and enter your name and email.

Once you've registered, you'll get a mail from TinyPNG with a link and once you click on that, you'll go to your developers page which also has your API key and your usage information. Do keep it mind that for the free account, you can only compress 500 images per month. For someone like me, that's a number I won't really be reaching in a month anytime soon. But if do, you should probably check out their paid plans.
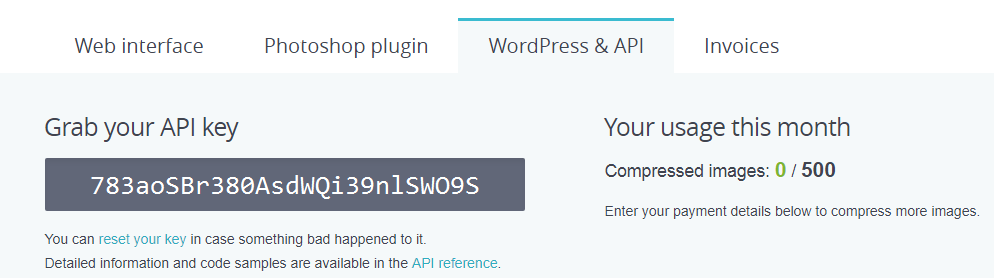
PS: That's not my real key :D
Get started
Once you've the developer key, you can start compressing images using their service. The full documentation for Python is here.
You start by installing Tinify, which is TinyPNG's library for compression.
pip install --upgrade tinify
Then we can start using tinify in code by importing it and setting the API key from your developer's page.
import tinify
tinify.key = 'API_Key'
If you've to send your requests over a proxy, you can set that as well.
tinify.proxy = "http://user:pass@192.168.0.1:8080"
Then, you can start compressing your image files. You can upload either PNG or JPEG files and tinify will compress it for you.
For the purpose of this article, I'm going to use the following delorean.jpeg image.

And I'll compress this to delorean-compressed.jpeg. For that we'll use the following code:
source = "delorean.jpeg"
destination = "delorean-compressed.jpeg"

original = tinify.from_file(source)
original.to_file(destination)
And that gives me this file:

If they both look the same, then that is the magic of TinyPNG's compression algorithm. It looks pretty much identical but it did compress it. To verify that, let's print the file sizes.
import os.path as path

original_size = path.getsize(source)
compressed_size = path.getsize(destination)
print(original_size/1024, compressed_size/1024)
And this prints,
29.0029296875 25.3466796875 1.144249662878058
The file was original 29 KB and now after compression it is 25.3 KB which is a fairly good compression for such a small file. If the original file was bigger, you will be able to see an even tighter compression.
And since this is the free version, there's a limit on the number of requests we can make. We can keep track of that with a built-in variable compression_count. You can print that after every requests to make sure you don't go over that.
compressions_this_month = tinify.compression_count
print(compressions_this_month)
You can also compress images from their URL's and store it locally. You will just do:
original = tinify.from_url("https://raw.githubusercontent.com/durgaswaroop/delorean/master/delorean.jpeg")
And then you can store the compressed file locally just like before.
Apart from just compressing the images, you can also resize them with TinyPNG's API. We'll cover that in the tomorrow's article here.
So, That is all for this article.
For more programming articles, checkout Freblogg, Freblogg/Python
Some articles on automation:
Web Scraping For Beginners with Python
My semi automated workflow for blogging
Publish articles to Blogger automatically
Publish articles to Medium automatically
This is the 13th article as part of my twitter challenge #30DaysOfBlogging. Seventeen more articles on various topics, including but not limited to, Java, Git, Vim, Software Development, Python, to come.
If you are interested in this, make sure to follow me on Twitter @durgaswaroop.
If you are interested in contributing to any open source projects and haven't found the right project or if you were unsure on how to begin, I would like to suggest my own project, Delorean which is a Distributed Version control system, built from scratch in scala. You can contribute not only in the form of code, but also with usage documentation and also by identifying any bugs in its functionality.
Thanks for reading. See you again in the next article.